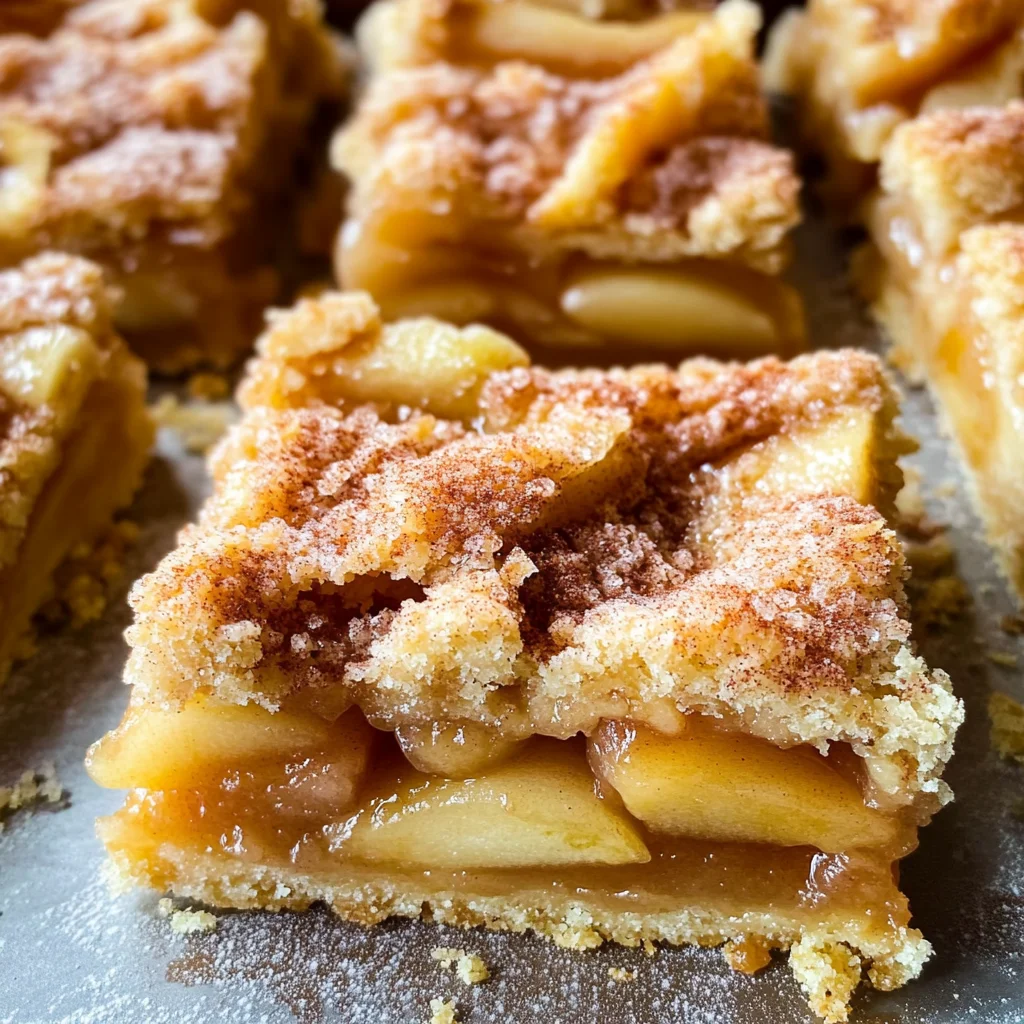
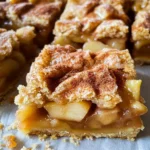
How to Make the Best Apple Pie Bars
If you’re looking for a cozy dessert that brings back warm memories, you’ve come to the right place! I can’t wait to share with you how to make the best apple pie bars. These delightful treats are like a hug in food form, perfect for busy weeknights or family gatherings. They combine the comforting flavors of classic apple pie into a convenient bar form, making them easy to share—and even easier to eat!
What makes these apple pie bars special is their simplicity and heartwarming flavor. Whether it’s a chilly evening or a festive occasion, they are sure to be a hit. Trust me; once you take that first bite, you’ll understand why this recipe has become a treasured favorite.
Why You’ll Love This Recipe
- Easy to make: With just a few steps, you’ll have delicious apple pie bars ready in no time!
- Family-friendly: Everyone loves the sweet and spiced apple filling wrapped in a buttery crust.
- Make-ahead convenience: Prepare these bars in advance for an effortless dessert after dinner or for potlucks.
- Delicious flavor: The combination of fresh apples and warm spices will fill your kitchen with an irresistible aroma.
Ingredients You’ll Need
Gathering ingredients for this recipe is simple! These wholesome items will come together beautifully to create your apple pie bars.
For the Crust
- 1 cup all-purpose flour
- 1/2 cup unsalted butter, softened
- 1/4 cup granulated sugar
- 1/4 teaspoon salt
For the Filling
- 2 cups peeled and diced apples (Granny Smith works great!)
- 1/4 cup brown sugar
- 1 teaspoon cinnamon
- 1 tablespoon lemon juice
- 1 tablespoon cornstarch
Variations
One of the best things about these apple pie bars is their flexibility! Feel free to mix it up and try some of these fun variations:
- Add nuts: Toss in some chopped walnuts or pecans for extra crunch and flavor.
- Mix fruits: Combine apples with pears or berries for a unique fruit medley.
- Change the spices: Experiment with nutmeg or ginger to add your personal twist.
How to Make How to Make the Best Apple Pie Bars
Step 1: Prepare the Crust
Start by preheating your oven to 350°F (175°C). In a mixing bowl, combine the flour, softened butter, sugar, and salt. Mix until the mixture resembles coarse crumbs. This step is important because it creates that flaky texture we all love in pie crusts. Press this mixture evenly into the bottom of an 8×8 inch baking dish—make sure it’s tightly packed!
Step 2: Make the Filling
In another bowl, mix together the diced apples, brown sugar, cinnamon, lemon juice, and cornstarch. Stir well until all the apples are coated. The lemon juice helps brighten the flavors while the cornstarch thickens the filling as it cooks. Spread this delicious mixture over your prepared crust evenly.
Step 3: Bake Your Bars
Place your baking dish in the preheated oven and bake for about 40 minutes or until the apples are tender and bubbly. The aroma will fill your kitchen with warmth—this is where patience pays off! Once baked, allow them to cool slightly before slicing into squares.
Step 4: Serve and Enjoy
These apple pie bars are best served warm but are delightful at room temperature too! They make a wonderful treat on their own or paired with a scoop of dairy-free ice cream. Enjoy sharing these with family and friends; everyone will love them!
Pro Tips for Making How to Make the Best Apple Pie Bars
Making apple pie bars can be a delightful experience, and these pro tips will help you create a dessert that’s not only delicious but also visually appealing.
- Choose the Right Apples: Opt for a mix of sweet and tart apples, such as Granny Smith and Honeycrisp. This combination enhances the flavor complexity and balances sweetness with acidity.
- Don’t Skimp on Spices: Adding cinnamon, nutmeg, or even a dash of vanilla extract can elevate the flavor profile of your bars. These spices enhance the warmth and comfort of your dessert.
- Chill Your Dough: After preparing your crust, let it chill in the fridge for at least 30 minutes. Chilling helps the butter firm up, resulting in a flakier crust that holds its shape better during baking.
- Use Parchment Paper: Line your baking pan with parchment paper for easy removal. This simple step makes it easier to slice your bars and keeps them intact without any mess.
- Let Them Cool Before Serving: Allow your apple pie bars to cool completely before slicing. This helps the filling set up nicely, ensuring clean cuts and perfect presentation.
How to Serve How to Make the Best Apple Pie Bars
Presenting your apple pie bars beautifully can make all the difference at any gathering. Here are some fun ways to serve them!
Garnishes
- Powdered Sugar: A light dusting of powdered sugar adds sweetness and visual appeal, making your bars look extra special.
- Vanilla Ice Cream: Serve warm apple pie bars with a scoop of creamy vanilla ice cream. The cold ice cream melts slightly on the warm bars, creating a deliciously indulgent contrast.
Side Dishes
- Whipped Coconut Cream: This dairy-free alternative adds a luscious texture that complements the flavors of apple pie perfectly.
- Caramel Sauce: Drizzling homemade or store-bought caramel sauce over your apple pie bars can add an extra layer of sweetness that many will love.
- Mixed Green Salad: A simple arugula or spinach salad dressed in lemon vinaigrette offers a refreshing contrast to the rich flavors of the dessert.
- Chai Tea: Pairing these apple pie bars with a warm cup of chai tea brings out warming spices that harmonize beautifully with the dessert.
With these tips and serving suggestions, you’re all set to impress friends and family with your delicious homemade apple pie bars! Enjoy every bite!

Make Ahead and Storage
These delightful apple pie bars are perfect for meal prep! You can easily make them ahead of time and store them for later enjoyment. Here’s how to keep your treats fresh and delicious.
Storing Leftovers
- Allow the apple pie bars to cool completely.
- Place them in an airtight container at room temperature for up to 2 days.
- For longer storage, refrigerate them in the same container for up to a week.
Freezing
- Cut the apple pie bars into squares before freezing for easy serving.
- Wrap each square tightly in plastic wrap and then place them in a freezer-safe bag or container.
- They can be frozen for up to 3 months. Just make sure to label the bag with the date!
Reheating
- To reheat, remove the desired number of bars from the freezer.
- Thaw in the refrigerator overnight or at room temperature for a few hours.
- Warm them in a preheated oven at 350°F (175°C) for about 10-15 minutes or until heated through. Enjoy with a scoop of dairy-free vanilla ice cream!
FAQs
Here are some common questions you might have about this recipe!
How to Make the Best Apple Pie Bars without using animal-derived gelatin?
You can achieve a perfect filling by using cornstarch or arrowroot powder as a thickener instead of gelatin. This will keep your filling nice and gooey while ensuring it’s completely plant-based!
Can I use other fruits when learning how to make the best apple pie bars?
Absolutely! Pears, cherries, or even peaches can be used instead of apples. Just adjust the sugar according to the sweetness of the fruits you choose.
What if I don’t have fresh apples for my apple pie bars?
If fresh apples aren’t available, you can use canned apple slices (drained) or frozen apples. Just ensure they’re thawed and drained well before use!
How long do homemade apple pie bars last?
When stored properly, homemade apple pie bars can last up to a week in the refrigerator or up to three months in the freezer.
Final Thoughts
I truly hope you enjoy making these scrumptious apple pie bars as much as I do! They are not just a treat but also a wonderful way to share warmth and comfort with friends and family. Don’t hesitate to get creative with your ingredients—after all, baking is all about having fun! Happy baking, and I can’t wait for you to savor every bite!
Apple Pie Bars
If you’re craving a cozy dessert that evokes warm memories, these apple pie bars are just what you need! Combining the classic flavors of apple pie into a convenient bar form, they’re perfect for busy weeknights or family gatherings. With their simple preparation and heartwarming taste, these bars are sure to become a favorite in your home. Whether enjoyed warm or at room temperature, they offer irresistible flavor and comforting aroma, making them a delightful treat for any occasion.
- Prep Time: 20 minutes
- Cook Time: 40 minutes
- Total Time: 1 hour
- Yield: Approximately 12 servings 1x
- Category: Dessert
- Method: Baking
- Cuisine: American
Ingredients
- 1 cup all-purpose flour
- 1/2 cup unsalted butter, softened
- 1/4 cup granulated sugar
- 1/4 teaspoon salt
- 2 cups peeled and diced apples (preferably Granny Smith)
- 1/4 cup brown sugar
- 1 teaspoon cinnamon
- 1 tablespoon lemon juice
- 1 tablespoon cornstarch
Instructions
- Preheat your oven to 350°F (175°C). In a mixing bowl, combine flour, butter, sugar, and salt until crumbly. Press evenly into an 8×8 inch baking dish.
- In another bowl, mix diced apples with brown sugar, cinnamon, lemon juice, and cornstarch until coated. Spread the mixture over the crust.
- Bake for about 40 minutes or until the filling is bubbly and apples are tender. Allow to cool slightly before slicing into squares.
- Serve warm or at room temperature; pair with dairy-free ice cream for an extra treat!
Nutrition
- Serving Size: 1 bar (50g)
- Calories: 190
- Sugar: 12g
- Sodium: 66mg
- Fat: 9g
- Saturated Fat: 5g
- Unsaturated Fat: 3g
- Trans Fat: 0g
- Carbohydrates: 27g
- Fiber: 2g
- Protein: 2g
- Cholesterol: 15mg