Peppermint Pie
If you’re looking for a delightful treat to brighten up your holiday gatherings, look no further than this creamy Peppermint Pie! This dessert has been a beloved staple at our family celebrations for years. Its refreshing peppermint flavor and velvety texture make it an irresistible option that everyone can enjoy. Plus, it’s super easy to whip up, so you won’t have to spend all day in the kitchen!
Whether you’re hosting a cozy family dinner or need a quick dessert for a potluck, this Peppermint Pie will always steal the show. Imagine slicing into that cool, vibrant pie and watching as everyone’s faces light up with joy—pure magic!
Why You’ll Love This Recipe
- Quick preparation: With just 10 minutes of prep time, you can have this pie ready to chill while you focus on other holiday duties.
- Family-friendly appeal: Kids and adults alike will love the sweet peppermint flavor combined with the crunchy Oreo crust!
- Make-ahead convenience: You can prepare this pie a day in advance, freeing up your schedule when it’s time to celebrate.
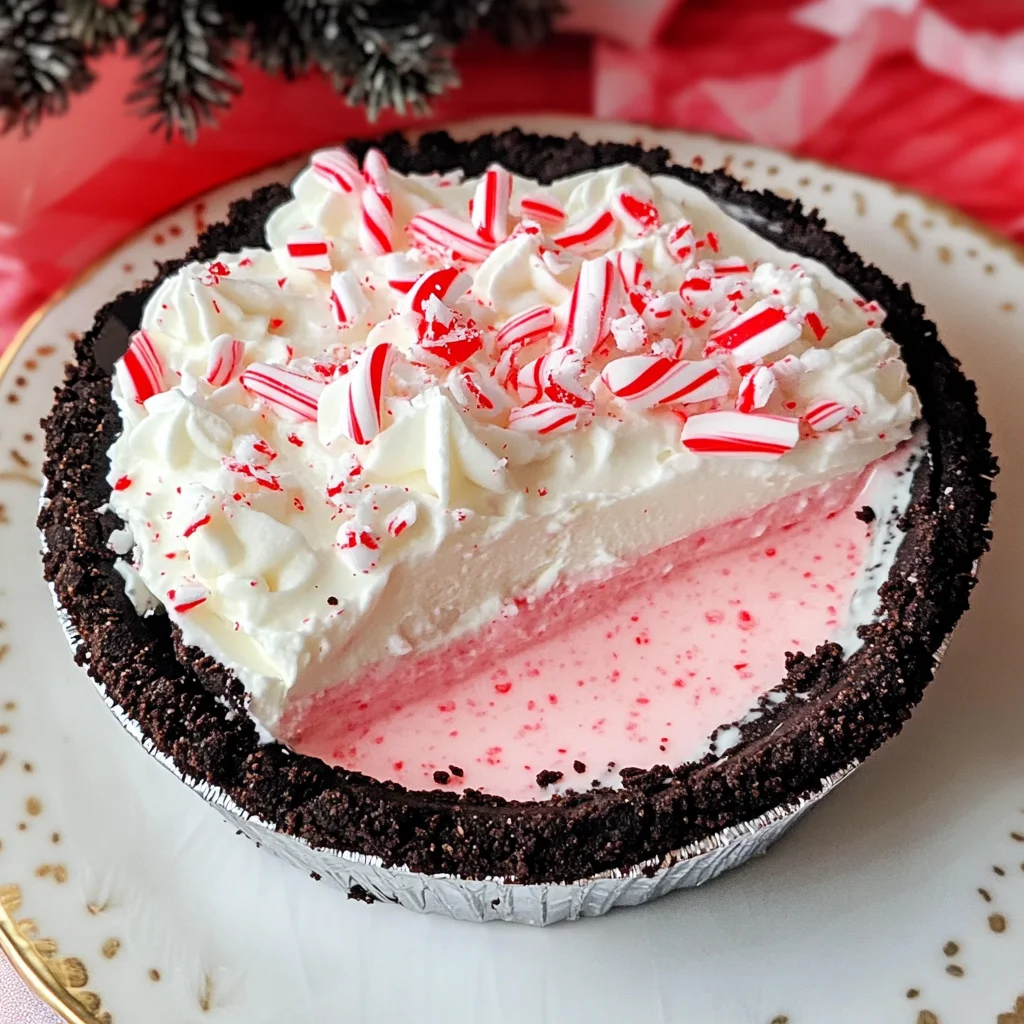
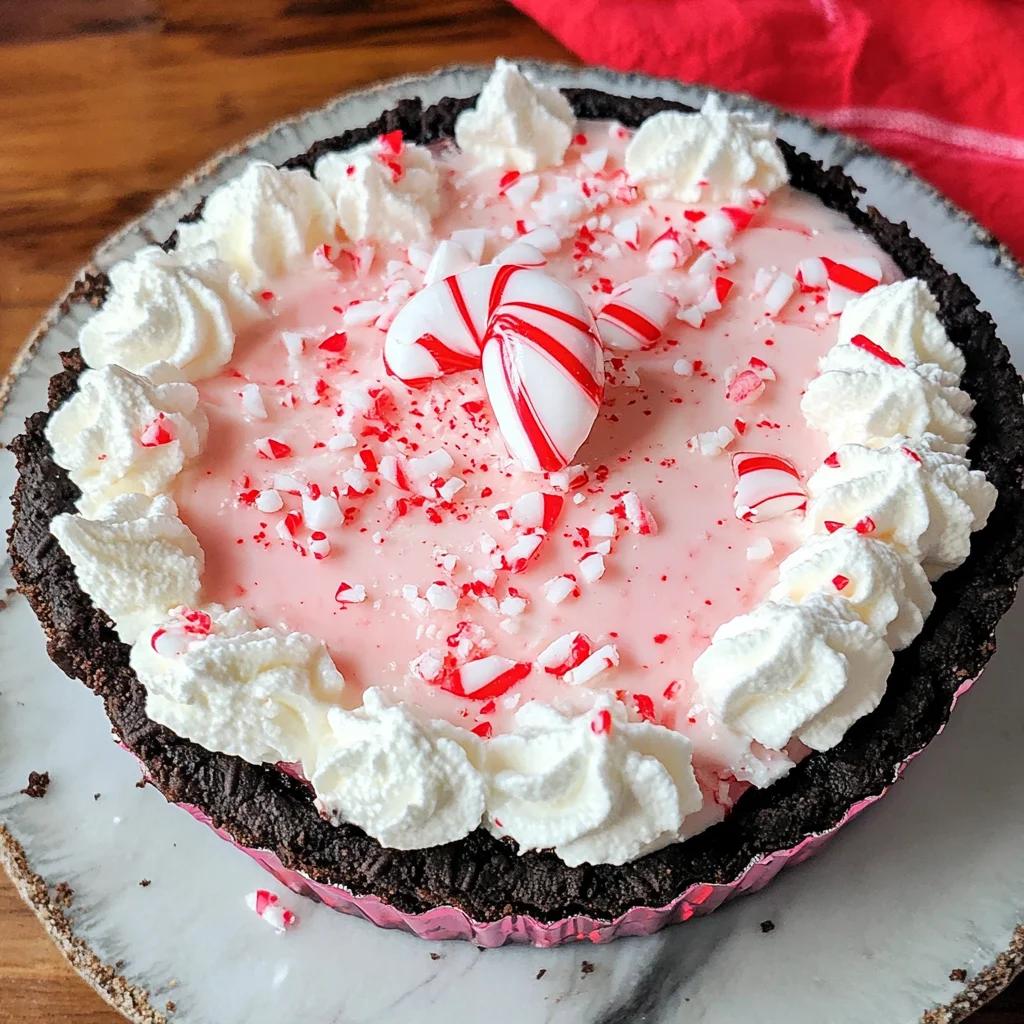
- Festive presentation: The vibrant red swirls and crushed peppermint on top make this pie not just delicious but also visually stunning.
Ingredients You’ll Need
To create this scrumptious Peppermint Pie, gather these simple and wholesome ingredients. They come together beautifully to create a dessert that feels both special and comforting.
For the Filling
- 1 cup heavy cream
- 1½ cup powdered sugar
- 16 ounces cream cheese (softened, two 8-ounce packages)
- 10 drops red food coloring
- 2 teaspoons vanilla extract
- 1 teaspoon peppermint extract
- ½ cup peppermint candy canes or mints (crushed)
For the Crust
- 2 Oreo pie crusts
For Topping
- 16 ounces Cool Whip
- Crushed peppermint candy (for decoration)
Variations
This Peppermint Pie is wonderfully flexible! Feel free to get creative with these fun variations:
- Add some chocolate: Mix in some mini chocolate chips for an extra layer of flavor!
- Go nutty: Sprinkle chopped nuts over the filling before adding the Cool Whip for added crunch.
- Try different extracts: Swap out peppermint extract for vanilla or almond for a unique twist on flavor.
How to Make Peppermint Pie
Step 1: Whip the Cream
In a large bowl, whip the heavy cream until stiff peaks form. This is crucial because it gives the pie its lovely lightness and fluffy texture. Set aside while you prepare the other components.
Step 2: Cream Together Sugar and Cream Cheese
In another medium bowl, cream together the powdered sugar and softened cream cheese. This step ensures that your filling is smooth and free of lumps, which will result in a more enjoyable eating experience.
Step 3: Add Flavor and Color
Next, add the red food coloring, peppermint extract, and vanilla extract to your cream cheese mixture. Mix until you achieve a uniform color—it’s all about that festive look!
Step 4: Incorporate Peppermint Candy
Gently mix in ½ cup of crushed peppermint candy into your cream cheese/powdered sugar mixture. This adds delightful little bits of crunch and bursts of minty flavor throughout your pie.
Step 5: Combine Mixtures Gently
Now it’s time to bring everything together! Add your powdered sugar/cream cheese mixture to the whipped heavy cream. Mix on low speed until just combined. Be careful not to overmix—keeping that airy texture is key!
Step 6: Fill Your Crusts
Pour half of this creamy filling into each Oreo crust. Take your time spreading it evenly; this ensures every slice has that perfect balance of flavors.
Step 7: Chill and Decorate
Top each pie with Cool Whip and sprinkle crushed peppermint on top for decoration. Now comes the hardest part—chill for 1 to 2 hours before serving! This allows all those flavors to meld together beautifully.
Enjoy every delicious bite of this homemade Peppermint Pie—it’s sure to become a cherished recipe in your home too!
Pro Tips for Making Peppermint Pie
Creating the perfect peppermint pie is all about attention to detail and a splash of creativity! Here are some pro tips to ensure your dessert turns out irresistibly delicious.
- Use room temperature cream cheese – This ensures a smooth and creamy filling without lumps, making your pie’s texture delightful.
- Don’t skip the chilling time – Allowing your pie to chill for at least 1 to 2 hours helps it set properly, enhancing the flavors and making it easier to slice.
- Experiment with mint varieties – If you want a unique twist, try using different types of mint candies or flavored extracts for added depth in flavor.
- Add a layer of chocolate – Drizzling melted dairy-free chocolate over the top of the Cool Whip can add an extra rich layer that complements the peppermint beautifully.
- Use fresh peppermint leaves as garnish – Not only do they look beautiful, but they also provide a burst of fresh flavor that enhances every bite.
How to Serve Peppermint Pie
Serving peppermint pie can be as fun and festive as making it! Here are some creative ideas to present this delightful dessert beautifully.
Garnishes
- Crushed peppermint candy – Sprinkle crushed candy on top of the Cool Whip for a pop of color and extra crunch.
- Chocolate shavings – Adding dark chocolate shavings creates an elegant touch that perfectly contrasts with the creamy filling.
- Whipped coconut cream – For a lighter alternative, top with whipped coconut cream instead of Cool Whip for an extra layer of flavor.
Side Dishes
- Fresh fruit salad – A light fruit salad can balance out the richness of the pie, adding freshness and color to your dessert spread.
- Chocolate-covered strawberries – These sweet treats are not only visually appealing but also pair well with peppermint, creating a lovely combination of flavors.
- Vanilla ice cream (dairy-free) – A scoop of vanilla ice cream alongside your slice adds creaminess and temperature contrast that makes each bite even more enjoyable.
- Coffee or herbal tea – Serving peppermint pie with a warm beverage like coffee or herbal tea can create a cozy atmosphere, enhancing the overall experience.
Now you’re all set to impress your guests with this delightful peppermint pie! Enjoy every bite and happy baking!
Make Ahead and Storage
This peppermint pie is not only a delightful treat but also perfect for meal prep! You can easily make it ahead of time and store it, ensuring you have a delicious dessert ready whenever the craving strikes.
Storing Leftovers
- Place any leftover pie in an airtight container in the refrigerator.
- Consume within 3-4 days for optimal freshness.
- If storing individual slices, wrap them in plastic wrap before placing them in a container.
Freezing
- To freeze, ensure the pie is well covered with plastic wrap or aluminum foil.
- It can be stored in the freezer for up to 2 months.
- Thaw in the refrigerator overnight before serving.
Reheating
- This peppermint pie is best enjoyed cold, so there’s no need to reheat!
- If you prefer a slightly softer texture, let it sit at room temperature for about 15-20 minutes before serving.
FAQs
Got questions about this delicious peppermint pie? Here are some common queries from fellow dessert lovers.
Can I use a different type of crust for my Peppermint Pie?
Absolutely! While Oreo crust adds a wonderful chocolatey flavor, you can use any pie crust you prefer. Graham cracker crusts or even a homemade cookie crust work beautifully too.
How can I adjust the sweetness of my Peppermint Pie?
If you find that your pie is too sweet, reduce the amount of powdered sugar by half a cup. You can also balance the sweetness by adding more peppermint extract for flavor without additional sugar.
Is there a way to make this Peppermint Pie healthier?
You can opt for reduced-fat cream cheese and lighter Cool Whip alternatives to lower calories and fat content. Additionally, using less powdered sugar will help create a healthier version while still being delicious!
What occasions are perfect for serving Peppermint Pie?
This Peppermint Pie is ideal for holiday gatherings, festive dinners, or even as a sweet surprise during winter celebrations. It’s great anytime you want to impress guests with something cool and creamy!
Final Thoughts
I hope you enjoy making this delightful peppermint pie as much as I do! It’s a special recipe that brings joy and cheer, perfect for sharing with family and friends during the holidays or any occasion. Get ready to savor every bite of this cool, creamy dessert. Happy baking!
Peppermint Pie
Indulge in the delightful charm of this creamy Peppermint Pie, the perfect dessert to elevate your holiday gatherings. This no-bake treat combines a luscious peppermint filling with a crunchy Oreo crust, creating a festive masterpiece that everyone will love. With its refreshing mint flavor and velvety texture, this pie is not just easy to prepare—it’s also ideal for making ahead of time, allowing you to focus on enjoying your celebration. Each slice reveals vibrant red swirls and is topped with crushed peppermint for an eye-catching finish. Serve it chilled for an exquisite dessert experience that will leave your guests asking for seconds!
- Prep Time: 10 minutes
- Cook Time: Chilling Time: 2 hours
- Total Time: 0 hours
- Yield: Serves approximately 8 slices 1x
- Category: Dessert
- Method: No-Bake
- Cuisine: American
Ingredients
- 16 ounces cream cheese (softened)
- 1½ cups powdered sugar
- 1 cup heavy cream
- 2 teaspoons vanilla extract
- 1 teaspoon peppermint extract
- 10 drops red food coloring
- ½ cup crushed peppermint candy
- 2 Oreo pie crusts
- 16 ounces Cool Whip
Instructions
- In a large bowl, whip the heavy cream until stiff peaks form. Set aside.
- In another bowl, blend the softened cream cheese and powdered sugar until smooth.
- Add red food coloring, vanilla extract, and peppermint extract to the cream cheese mixture; mix until well combined.
- Fold in the crushed peppermint candy gently.
- Carefully combine the cream cheese mixture with the whipped cream until just mixed.
- Pour half of the filling into each Oreo crust and spread evenly.
- Top with Cool Whip and sprinkle additional crushed peppermint on top.
- Chill for 1 to 2 hours before serving.
Nutrition
- Serving Size: 1 slice (approximately 100g)
- Calories: 320
- Sugar: 25g
- Sodium: 210mg
- Fat: 23g
- Saturated Fat: 14g
- Unsaturated Fat: 8g
- Trans Fat: 0g
- Carbohydrates: 28g
- Fiber: 1g
- Protein: 4g
- Cholesterol: 60mg