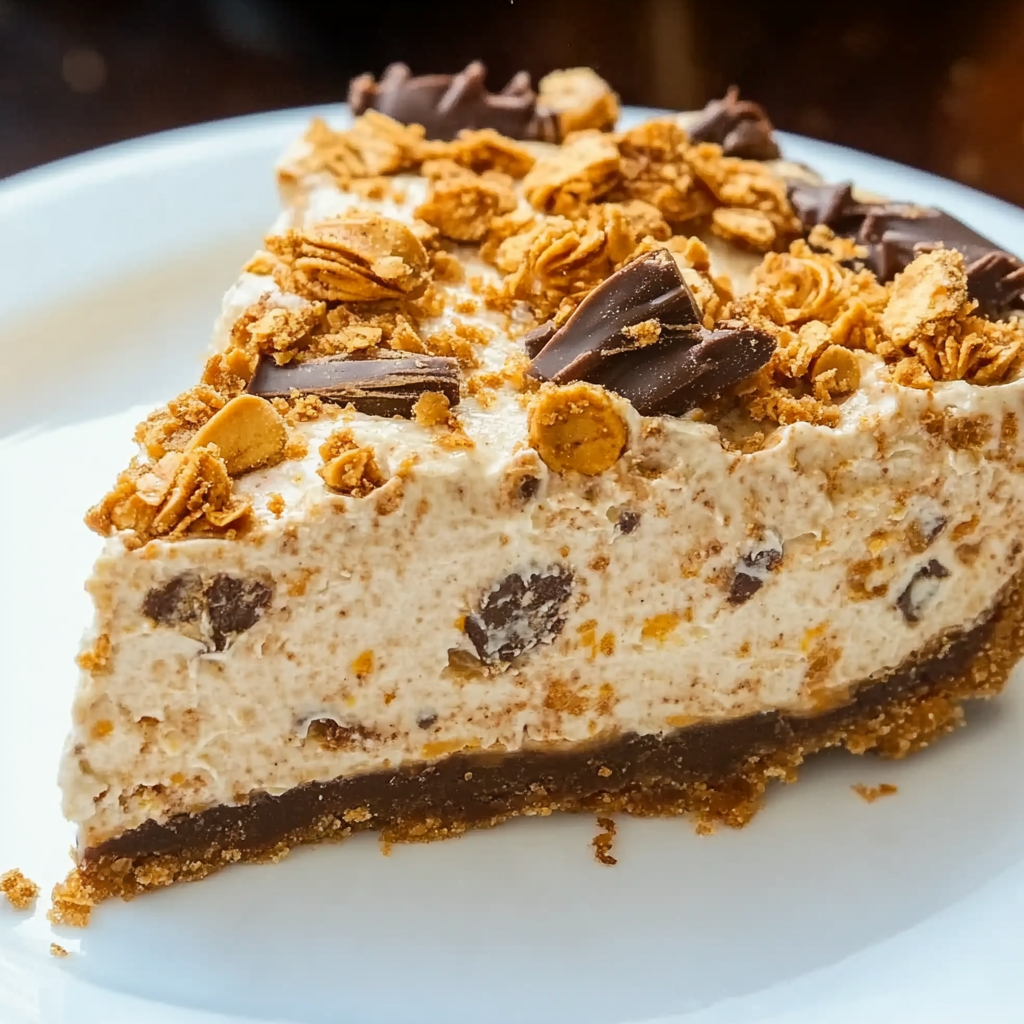
Butterfinger Pie
If you’re looking for a dessert that combines nostalgia and pure indulgence, then let me introduce you to Butterfinger Pie! This delightful treat is a cool and creamy sensation that will have your taste buds dancing with joy. Perfect for busy weeknights or family gatherings, it’s a no-bake dessert that comes together in just 15 minutes. Your loved ones will be raving about this sweet creation long after the last slice is gone!
What makes this Butterfinger Pie truly special is its rich flavor and simplicity. You don’t need to be a master baker to whip up this delicious pie; all you need are some basic ingredients and a little love. Plus, it’s sure to please both kids and adults alike—an absolute win in my book!
Why You’ll Love This Recipe
- Super Easy to Prepare: With just a few simple steps, you can have this pie ready to chill in no time.
- Family-Friendly Delight: Everyone loves the combination of creamy peanut butter and crunchy Butterfinger bars!
- Make-Ahead Convenience: You can prepare this pie ahead of time, making it a perfect option for parties or potlucks.
- Irresistibly Delicious: The flavors come together in a way that’s sure to satisfy any sweet tooth!
Ingredients You’ll Need
Creating this Butterfinger Pie is all about using simple, wholesome ingredients that pack a punch of flavor. Here’s what you’ll need to bring this dreamy dessert to life:
For the Filling
- 1 (8-ounce) package cream cheese (room temperature)
- 1/2 cup creamy peanut butter
- 2 teaspoons vanilla extract
- 1 1/2 cups powdered sugar
- 1 (12.5-ounce) bag fun-sized butterfinger bars (crushed; reserve 2 bars to sprinkle on top)
- 1 (8-ounce) container Cool Whip (thawed)
For the Crust
- 1 store-bought oreo or chocolate graham cracker crust
Variations
This Butterfinger Pie recipe is wonderfully flexible! Here are some ideas on how you might put your own spin on it:
- Swap the Nut Butter: If you’re not a fan of peanut butter, try using almond butter or sunflower seed butter for a different flavor profile.
- Add Some Crunch: Mix in chopped nuts like pecans or walnuts for an extra crunch.
- Change Up the Topping: Instead of reserved Butterfinger bars, try topping with crushed Oreos or chocolate shavings for variety.
- Go Vegan: Use dairy-free cream cheese and whipped topping to make this dessert vegan-friendly without sacrificing taste.
How to Make Butterfinger Pie
Step 1: Mix the Creamy Base
Start by placing your room-temperature cream cheese and creamy peanut butter into a large mixing bowl. This step is essential because softened cream cheese mixes more smoothly with the peanut butter. Add in the vanilla extract and beat everything together with an electric mixer until it’s nice and smooth.
Step 2: Sweeten it Up
Next, gradually mix in the powdered sugar until everything is well combined. This will give your filling that sweet touch we all crave! Make sure there are no lumps left—smoothness is key for that melt-in-your-mouth experience.
Step 3: Add the Crunchy Goodness
Now it’s time to fold in those crushed Butterfinger bars! This step adds texture and bursts of flavor throughout your pie. Be gentle while folding so you don’t lose that wonderful lightness from the mixture.
Step 4: Fold in the Cool Whip
Gently fold in the thawed Cool Whip until everything is beautifully blended. This adds an airy quality to your filling, making each slice feel like a cloud of sweetness.
Step 5: Assemble Your Pie
Spread your delicious filling into your prepared crust evenly. Don’t forget to sprinkle those reserved crushed Butterfinger bars on top—they’ll provide an extra crunch and look so tempting!
Step 6: Chill Out!
Finally, cover your pie with plastic wrap and refrigerate it for at least four hours before serving. This allows all those delicious flavors to meld together beautifully. Trust me; waiting will be worth it when you take that first bite!
Pro Tips for Making Butterfinger Pie
Creating the perfect Butterfinger Pie is easier than you might think! Here are some handy tips to ensure your pie turns out fabulous every time.
- Use room temperature cream cheese: This helps to blend seamlessly with the peanut butter, resulting in a smoother and creamier filling. Cold cream cheese can leave lumps in your pie that are less than desirable.
- Crush the Butterfinger bars finely: Crushing the Butterfingers into smaller pieces will distribute their delicious flavor throughout the pie, allowing each bite to be packed with that beloved crunch and taste.
- Don’t skip the chilling time: Refrigerating the pie for at least 4 hours (or even overnight) allows it to set properly, ensuring that each slice holds its shape. It also enhances the flavors as they meld together beautifully.
- Consider using a homemade crust: While a store-bought crust is convenient, making your own with crushed cookies and melted dairy-free butter can add an extra layer of flavor and make your pie feel even more special.
- Experiment with different toppings: Feel free to get creative! Adding whipped coconut cream or drizzling chocolate sauce over your pie can elevate it further and impress your guests.
How to Serve Butterfinger Pie
Serving Butterfinger Pie can be just as fun as making it! With a few simple ideas, you can present this dessert in style and make it an instant hit at any gathering.
Garnishes
- Chocolate drizzle: A quick drizzle of melted dairy-free chocolate adds elegance and a rich chocolatey flavor that pairs beautifully with the creamy filling.
- Whipped coconut cream: Top each slice with a dollop of whipped coconut cream for an extra layer of creaminess that complements the pie perfectly.
- Chopped nuts: Sprinkling some chopped peanuts or pecans on top adds a delightful crunch and enhances the nutty flavor already present in the pie.
Side Dishes
- Fresh fruit salad: A colorful bowl of seasonal fruits adds freshness to the meal, balancing out the richness of the Butterfinger Pie.
- Vanilla almond milkshake: This creamy shake is a perfect complement to the dessert. The vanilla flavor is subtle enough not to overpower but still deliciously satisfying.
- Chocolate chip cookies: Classic chocolate chip cookies offer a nostalgic touch alongside your pie, providing another sweet treat for guests who love cookies.
- Coffee or herbal tea: Serving a warm beverage can be a nice contrast to the coolness of the Butterfinger Pie, enhancing flavors while providing a comforting finish to any meal.
With these serving suggestions and pro tips, your Butterfinger Pie will surely be a showstopper at any occasion! Enjoy every creamy, crunchy bite.
Make Ahead and Storage
This Butterfinger Pie is not only delicious but also perfect for meal prep! You can whip it up ahead of time, making it an ideal dessert for gatherings or busy weeknights. Here’s how to store it properly:
Storing Leftovers
- Store any leftovers in an airtight container in the refrigerator.
- The pie will keep well for up to 3 days, but it’s best enjoyed fresh.
Freezing
- If you want to make this pie well in advance, you can freeze it!
- Wrap the pie tightly in plastic wrap and then aluminum foil to prevent freezer burn.
- It will last in the freezer for up to 2 months.
- Thaw the pie overnight in the refrigerator before serving.
Reheating
- Since this is a no-bake dessert, there’s no need to reheat it.
- Serve cold straight from the fridge for the best taste and texture.
FAQs
Here are some common questions about Butterfinger Pie that might help you out!
Can I make Butterfinger Pie without cream cheese?
Absolutely! You can substitute cream cheese with a non-dairy alternative like vegan cream cheese or even whipped coconut cream for a lighter option.
How long does Butterfinger Pie last?
Stored properly, Butterfinger Pie will remain fresh in the refrigerator for up to 3 days. If frozen, it can last up to 2 months.
What can I use instead of Cool Whip in Butterfinger Pie?
You can use homemade whipped cream as a delightful alternative. Just whip heavy cream with a bit of powdered sugar until soft peaks form.
Is Butterfinger Pie suitable for a potluck?
Yes! This pie is perfect for potlucks since it’s easy to transport and everyone loves its rich flavor. Just remember to keep it chilled until serving!
Can I use different candy bars in this pie?
Certainly! Feel free to swap out Butterfinger bars with your favorite chocolate or candy bars—just make sure they’re crushed into similar sizes for mixing!
Final Thoughts
This Butterfinger Pie truly is a delightful treat that combines creamy textures with crunchy bits of candy throughout. It’s simple enough for anyone to make yet indulgent enough to impress your friends and family. I hope you enjoy crafting this sweet masterpiece as much as I do! Don’t hesitate to try it out; I’m sure you’ll love every bite!
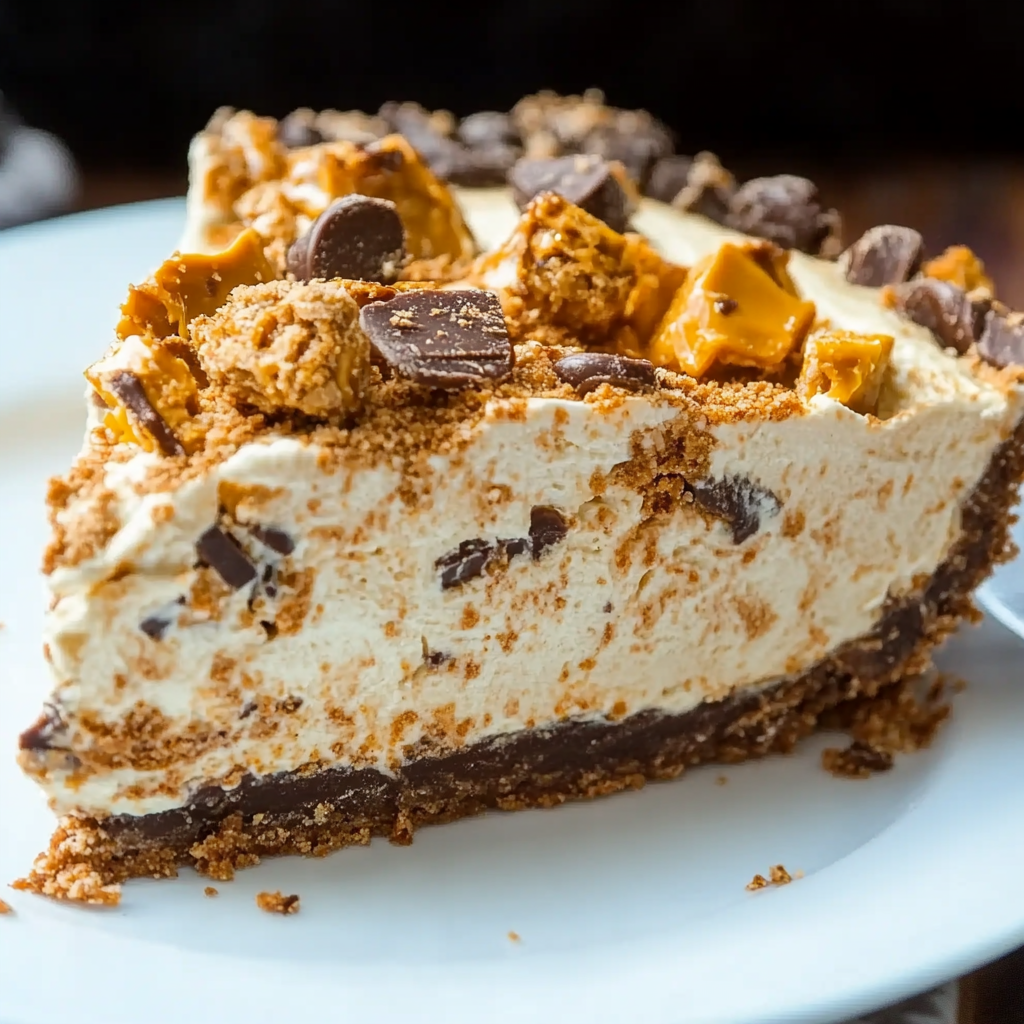
Butterfinger Pie
Indulge in the delightful creaminess of Butterfinger Pie, an easy no-bake dessert that will transport you back to childhood with every bite. This luscious treat combines smooth peanut butter and crunchy Butterfinger bars for a flavor explosion that’s perfect for family gatherings, parties, or simply satisfying your sweet tooth. With minimal effort—just 15 minutes to prepare—you can create a stunning dessert that everyone will rave about. The rich textures and sweet flavors meld beautifully after chilling, making each slice a heavenly experience. Get ready to impress your loved ones with this delightful pie!
- Prep Time: 15 minutes
- Cook Time: None
- Total Time: 0 hours
- Yield: Serves 8
- Category: Dessert
- Method: No-bake
- Cuisine: American
Ingredients
- 1 (8-ounce) package cream cheese (room temperature)
- 1/2 cup creamy peanut butter
- 2 teaspoons vanilla extract
- 1 1/2 cups powdered sugar
- 1 (12.5-ounce) bag fun-sized Butterfinger bars (crushed; reserve 2 bars for topping)
- 1 (8-ounce) container Cool Whip (thawed)
- 1 store-bought chocolate graham cracker crust
Instructions
- In a large mixing bowl, beat room-temperature cream cheese and peanut butter until smooth. Add vanilla extract and mix well.
- Gradually incorporate powdered sugar until fully combined and smooth.
- Gently fold in crushed Butterfinger bars, ensuring even distribution without losing airiness.
- Carefully fold in the Cool Whip until fully blended.
- Spread the filling evenly into the prepared crust and sprinkle reserved crushed Butterfinger on top.
- Cover and refrigerate for at least four hours before serving to allow flavors to meld.
Nutrition
- Serving Size: 1 slice (approximately 100g)
- Calories: 320
- Sugar: 24g
- Sodium: 180mg
- Fat: 22g
- Saturated Fat: 10g
- Unsaturated Fat: 11g
- Trans Fat: 0g
- Carbohydrates: 30g
- Fiber: 1g
- Protein: 5g
- Cholesterol: 30mg