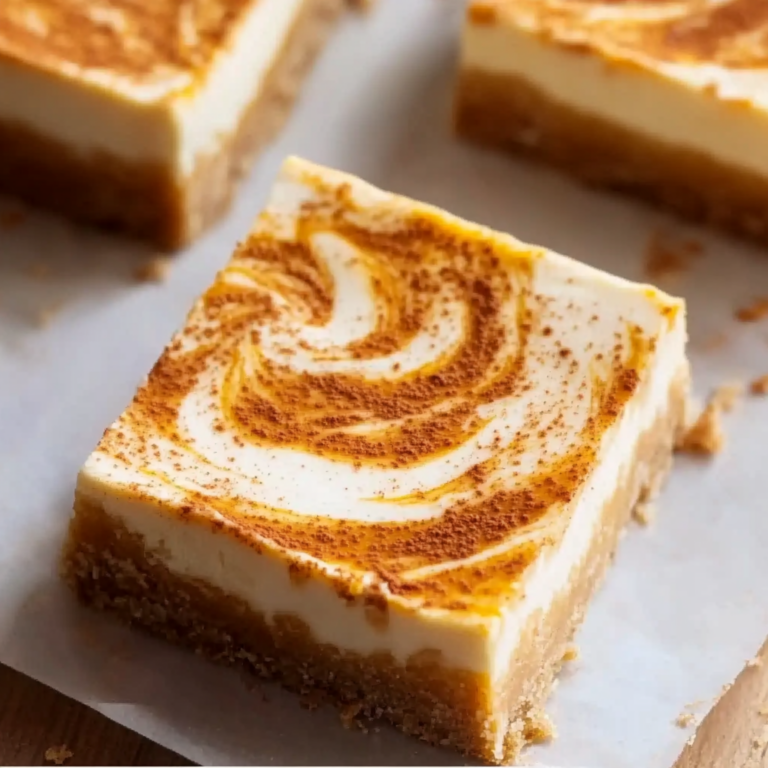
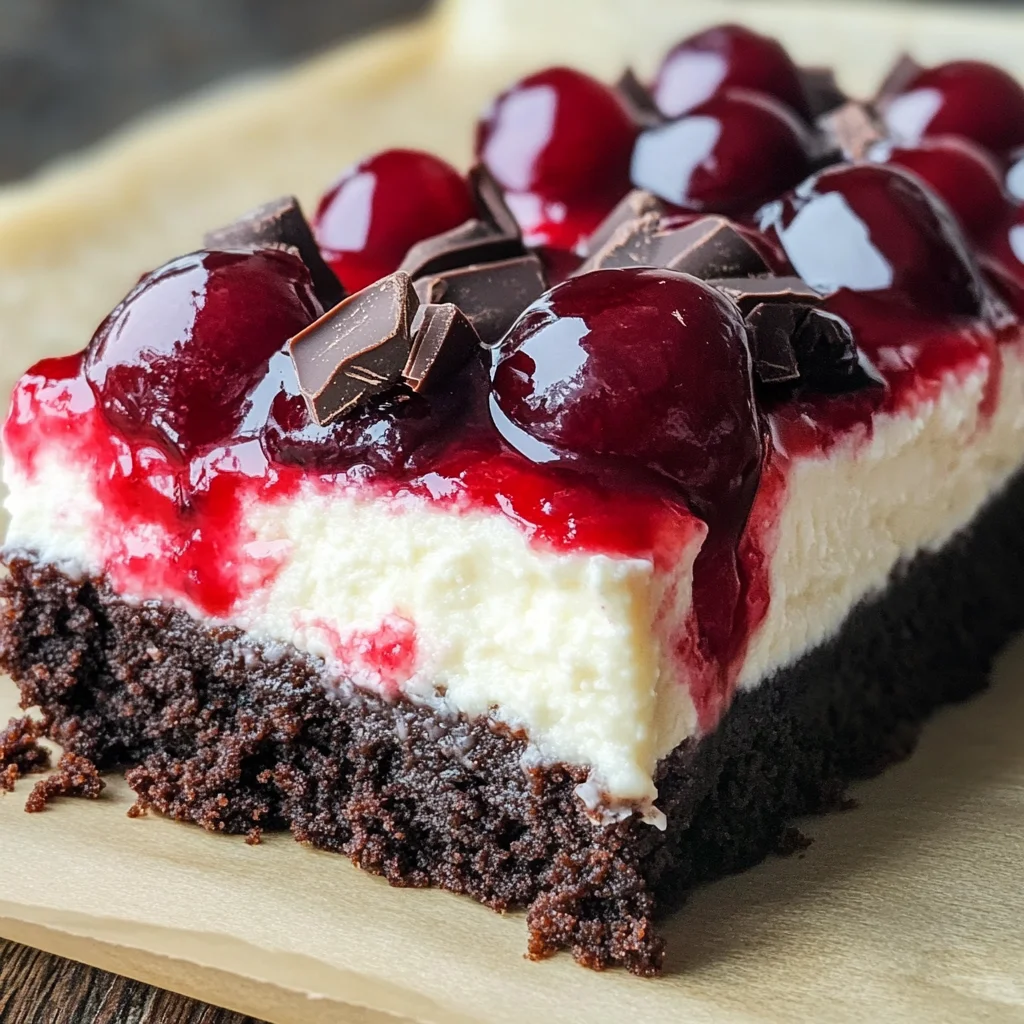
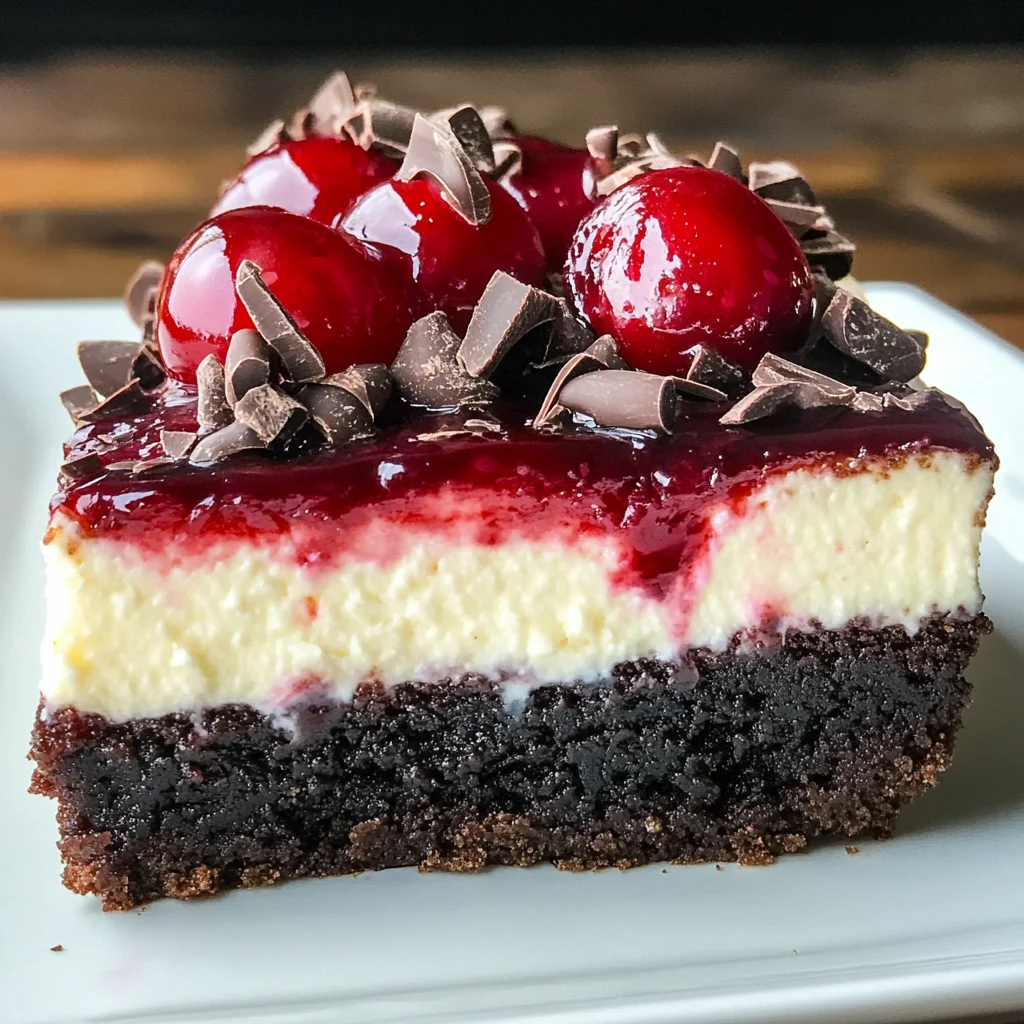
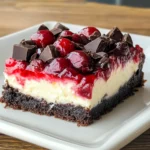
Black Forest Cheesecake Bars
If you’re looking for a dessert that feels like a warm hug on a plate, then these Black Forest Cheesecake Bars are just what you need! This recipe is a wonderful blend of rich chocolate and sweet cherries that will make your taste buds dance with joy. Whether you’re whipping them up for a cozy family gathering or just indulging yourself after a long week, these bars are sure to impress.
These delightful treats are not only mouthwatering but also incredibly easy to make. With their fudgy crust and creamy cheesecake layer, they’ll bring smiles to the faces of everyone who tries them. Perfect for any occasion, you might find yourself making them more often than you’d expect!
Why You’ll Love This Recipe
- Easy to Prepare: With simple steps and just a few ingredients, these bars come together in no time.
- Family-Friendly Delight: Kids and adults alike will love the combination of chocolate and cherries—it’s a crowd-pleaser!
- Make-Ahead Convenience: Bake them ahead of time; they store well in the fridge for days!
- Gorgeous Presentation: Topped with cherry pie filling, they look as good as they taste!
- Decadent Flavor: The rich layers create a dessert experience that’s truly unforgettable.
Ingredients You’ll Need
Gathering the right ingredients is part of the fun! For this recipe, you’ll be using simple and wholesome items that are probably already in your pantry. Here’s what you’ll need:
For the Crust
- 1 ½ cups chocolate cookie crumbs (such as Oreo, without filling)
- ¼ cup unsalted butter, melted
- 2 tbsp granulated sugar
For the Cheesecake Filling
- 16 oz cream cheese, softened
- ½ cup granulated sugar
- 2 large eggs
- 1 tsp vanilla extract
- ¼ cup sour cream (for a creamy texture)
- Pinch of salt
For Topping
- 1 can (21 oz) cherry pie filling
- Optional: dark chocolate shavings or curls for garnish
- Optional: whipped cream for serving
Variations
This recipe is wonderfully flexible! Feel free to get creative with your own twist on these Black Forest Cheesecake Bars. Here are some fun ideas:
- Try Different Crusts: Use graham cracker crumbs or even vanilla wafer crumbs for a different flavor base.
- Fruit Alternatives: Swap out the cherry pie filling for raspberry or blueberry if you want to mix it up!
- Add More Chocolate: Incorporate mini chocolate chips into the cheesecake layer for an extra chocolatey surprise.
- Go Nutty: Sprinkle some crushed nuts on top before serving for added crunch.
How to Make Black Forest Cheesecake Bars
Step 1: Preheat Your Oven
Start by preheating your oven to 325°F (160°C). This step is crucial because it ensures your cheesecake bakes evenly and comes out perfectly set.
Step 2: Prepare the Pan
Line a square baking pan with parchment paper. Leave some overhang on the sides; this little trick will help you lift the cheesecake bars out later without any fuss!
Step 3: Make the Crust
In a mixing bowl, combine your chocolate cookie crumbs, melted butter, and sugar. Mix until it resembles wet sand. Press this mixture firmly into the bottom of your prepared pan. This fudgy crust forms a delicious base that pairs beautifully with the creamy filling.
Step 4: Blend the Cheesecake Filling
In another bowl, beat together your softened cream cheese and sugar until smooth. Add in eggs one at a time, mixing well after each addition. Stir in vanilla extract, sour cream, and salt until everything is well-combined and silky.
Step 5: Pour and Bake
Pour the cheesecake filling over your prepared crust in an even layer. Pop it into the oven and let it bake for about 30 minutes or until it’s set but still slightly jiggly in the center.
Step 6: Cool and Top
Once baked, remove from the oven and let it cool completely at room temperature before refrigerating it for at least two hours (or overnight!). When ready to serve, top with cherry pie filling. For an extra treat, add dark chocolate shavings or curls!
These Black Forest Cheesecake Bars are truly special—enjoy every sweet bite!
Pro Tips for Making Black Forest Cheesecake Bars
Baking is all about having fun and experimenting, and these tips will help you create the perfect batch of Black Forest Cheesecake Bars!
- Use room temperature ingredients: This helps the cream cheese blend smoothly with the other ingredients, resulting in a creamy texture without lumps.
- Don’t overmix the cheesecake batter: Mixing too much can incorporate excess air, leading to cracks in your cheesecake. Mix just until combined for a smooth finish.
- Chill before slicing: Allowing the bars to cool completely and then refrigerating them for at least 4 hours (or overnight) makes them easier to slice and enhances the flavors.
- Experiment with crust options: While chocolate cookie crumbs are traditional, you can also use graham cracker crumbs or even nut-based crusts for a different twist.
- Add a touch of almond extract: A small amount of almond extract can enhance the cherry flavor, making your bars even more delightful. Just a teaspoon will do!
How to Serve Black Forest Cheesecake Bars
Serving these cheesecake bars can be as creative as you like! Here are some ideas that will not only make your dessert look stunning but also elevate its taste experience.
Garnishes
- Dark chocolate shavings: A sprinkle of dark chocolate shavings adds a rich, gourmet look and complements the chocolate crust beautifully.
- Fresh cherries: Top each bar with a fresh cherry for a pop of color and added freshness that pairs perfectly with the cherry filling.
- Mint leaves: A few sprigs of fresh mint not only provide a lovely color contrast but also add a refreshing aroma that brightens each bite.
Side Dishes
- Vanilla ice cream: A scoop of creamy vanilla ice cream serves as a perfect contrast to the rich cheesecake bars, providing a classic dessert experience.
- Coffee or espresso: The bitterness of coffee balances the sweetness of the bars wonderfully. Serve it alongside for an indulgent treat that’s sure to please!
- Mixed berry salad: A light mixed berry salad brings brightness and acidity, cutting through the richness of the cheesecake while adding another layer of flavor.
- Whipped coconut cream: For a dairy-free option, whipped coconut cream is an excellent alternative that adds lightness and complements the cherry topping beautifully.
Enjoy creating and sharing these delectable Black Forest Cheesecake Bars! They are sure to be a hit at any gathering or simply as a delightful treat at home.
Make Ahead and Storage
These Black Forest Cheesecake Bars are perfect for meal prep! You can whip them up in advance, making them an ideal dessert for gatherings or a sweet treat throughout the week.
Storing Leftovers
- Allow the cheesecake bars to cool completely in the pan.
- Cover the pan with plastic wrap or transfer bars to an airtight container.
- Store in the refrigerator for up to 5 days.
Freezing
- Cut into individual bars before freezing for easy serving later.
- Place bars on a baking sheet lined with parchment paper and freeze until solid.
- Transfer to a freezer-safe container or bag, separating layers with parchment paper.
- Freeze for up to 2 months.
Reheating
- If desired, let frozen bars thaw overnight in the refrigerator before serving.
- For a warm treat, place a bar on a microwave-safe plate and heat in short intervals (10-15 seconds) until just warmed through.
FAQs
Here are some common questions you might have about these delicious Black Forest Cheesecake Bars.
Can I use different cookie crumbs for my Black Forest Cheesecake Bars?
Absolutely! While chocolate cookie crumbs are traditional, you can experiment with other types of cookies like graham crackers or digestive biscuits. Just adjust the sugar based on the sweetness of your chosen cookie.
How can I make my Black Forest Cheesecake Bars even more decadent?
Consider adding mini chocolate chips or chopped bittersweet chocolate to your cheesecake layer before baking. This will enhance the chocolate flavor and add delightful texture!
Can I substitute cream cheese in this recipe?
Yes! You can use non-dairy cream cheese alternatives if you prefer a dairy-free option. The texture may vary slightly but should still yield delicious results.
How do I ensure my cheesecake layer is smooth?
Make sure your cream cheese is at room temperature before mixing. This helps avoid lumps. Also, mix gently after adding eggs to prevent incorporating too much air which can cause cracks during baking.
What should I serve with my Black Forest Cheesecake Bars?
These bars are delightful on their own, but you can serve them with a dollop of whipped cream or a drizzle of chocolate sauce for an extra special touch!
Final Thoughts
I hope you enjoy making these Black Forest Cheesecake Bars as much as I do! With their rich flavors and creamy texture, they’re sure to impress everyone at your next gathering or provide a delicious treat just for yourself. Don’t hesitate to get creative and make them your own—happy baking!
Black Forest Cheesecake Bars
Indulge in the delightful layers of Black Forest Cheesecake Bars, a perfect dessert that combines rich chocolate flavors with sweet cherries. These bars feature a fudgy chocolate cookie crust topped with a creamy cheesecake filling, creating a heavenly treat that’s both simple to make and stunning to serve. Whether for a family gathering or a personal indulgence, these bars are guaranteed to impress everyone. With their easy preparation and make-ahead convenience, you’ll find yourself reaching for this recipe time and again. Each bite delivers an unforgettable flavor experience, making it the ultimate dessert choice.
- Prep Time: 20 minutes
- Cook Time: 30 minutes
- Total Time: 50 minutes
- Yield: Approximately 18 servings 1x
- Category: Dessert
- Method: Baking
- Cuisine: American
Ingredients
- 1 ½ cups chocolate cookie crumbs (such as Oreo, without filling)
- ¼ cup unsalted butter, melted
- 16 oz cream cheese, softened
- ½ cup granulated sugar
- 2 large eggs
- 1 tsp vanilla extract
- ¼ cup sour cream
- Pinch of salt
- 1 can (21 oz) cherry pie filling
- Optional: dark chocolate shavings or curls for garnish
- Optional: whipped coconut cream for serving
Instructions
- Preheat your oven to 325°F (160°C).
- Line a square baking pan with parchment paper, allowing some overhang.
- In a bowl, mix chocolate cookie crumbs, melted butter, and sugar until combined. Press firmly into the bottom of the pan.
- Beat cream cheese and sugar in another bowl until smooth. Add eggs one at a time, followed by vanilla extract, sour cream, and salt; mix until well combined.
- Pour the cheesecake filling over the crust and bake for approximately 30 minutes until set but still slightly jiggly in the center.
- Cool completely at room temperature before refrigerating for at least two hours. Top with cherry pie filling before serving.
Nutrition
- Serving Size: 1 bar (55g)
- Calories: 210
- Sugar: 15g
- Sodium: 180mg
- Fat: 12g
- Saturated Fat: 7g
- Unsaturated Fat: 3g
- Trans Fat: 0g
- Carbohydrates: 22g
- Fiber: 1g
- Protein: 3g
- Cholesterol: 45mg